본 포스트는 JS(TS)로 블록과 맵 구현에 대한 게시글입니다.
😮 구현 방법
1. 블록 이미지 스프라이트 제작
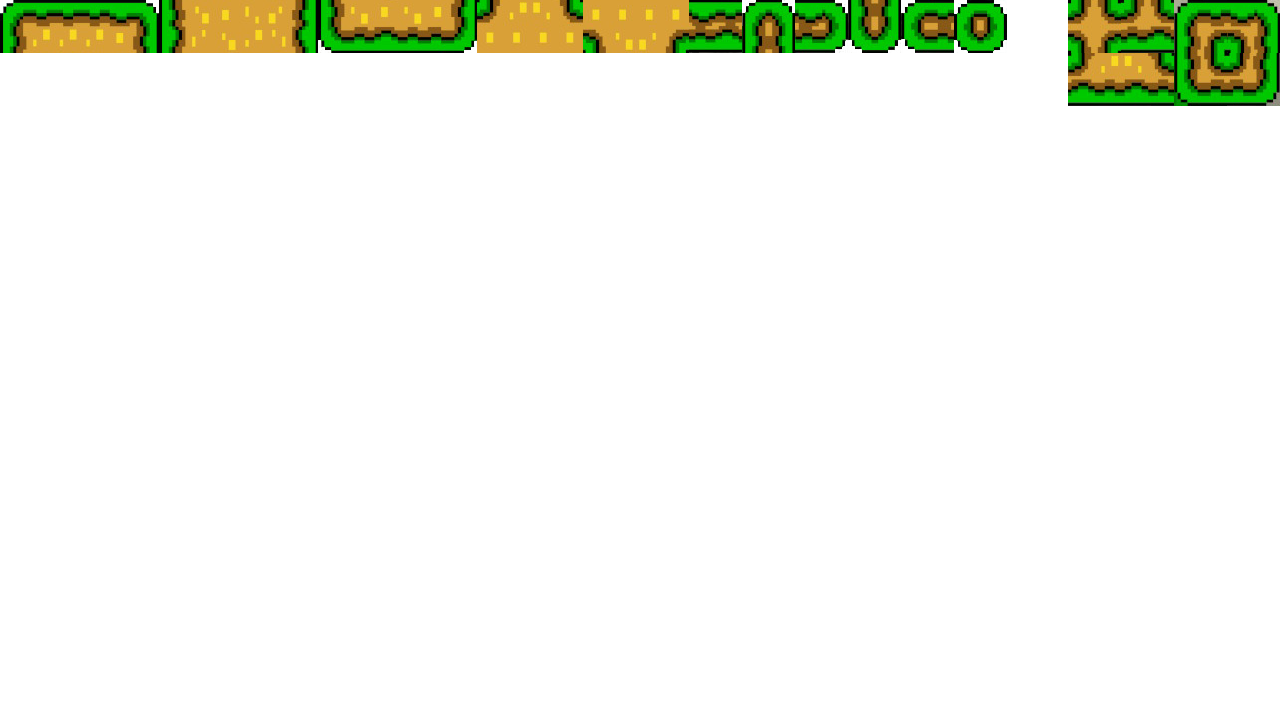
슈퍼 마리오 메이커 2라는 닌텐도 게임을 이용해서 필요한 블록의 형태를 하나하나 캡쳐하고 포토샵으로 편집해서 블록 이미지 스프라이트를 제작했습니다.
( 하나하나 자르고 배경 지우고 하다 보니 굳이 필요하지 않은 형태의 블록도 많이 보여서 현재 사용하고 있는 or 사용할만한 블록만 편집했습니다. )
 블록 이미지 스프라이트 ( 각 가로, 세로 53px )
2. 블록 클래스 생성
블록은 비슷한 형태로 여러 개를 찍어낼 것이기 때문에 클래스로 만들어서 객체로 찍어낼 수 있도록 구현했습니다.
또한 image, context의 경우에는 모두 공유하는 것이라서 static 변수로 생성했습니다.
1
2
3
4
5
6
7
8
9
10
11
12
13
14
15
16
17
18
19
20
21
22
23
24
25
26
27
28
29
30
31
32
33
34
35
36
37
38
39
40
41
42
43
44
45
46
47
48
49
50
51
52
53
54
55
56
57
58
59
60
61
62
63
64
65
66
67
68
69
70
71
72
73
// util : 이미지 스프라이트의 어떤 x, y 좌표에 어떤 이미지가 들어있는지 객체로 만든 맵핑 테이블
import { blockKeycode } from "../utils/index";

// type : 각 타입들
import type { BlockShape, BlockType, Position, Size } from "../types/index";

/**
 * 블록 클래스
 * @param image 블록의 스프라이트 이미지
 * @param ctx 배경화면을 그릴 "canvas"의 "context"
 *
 * @param position 블록이 그려질 캔버스의 좌표
 * @param size 그려질 블록의 크기
 * @param shape 그려질 블록의 형태
 * @param type 그려질 블록의 종류
 */
export default class Block {
  static image: HTMLImageElement;
  static ctx: CanvasRenderingContext2D;

  private position: Position;
  private size: Size;
  private shape: BlockShape;
  private type: BlockType;

  constructor(
    position: Position,
    shape: BlockShape,
    type: BlockType = "default"
  ) {
    // 처음만 이미지 로딩
    if (!Block.image) {
      Block.image = new Image();
      Block.image.src = "./assets/images/block.png";
    }

    this.position = position;
    this.shape = shape;
    this.size = { w: 100, h: 100 };
    this.type = type;
  }

  /**
   * 블록 렌더링
   */
  draw() {
    const { x, y } = this.position;
    const { w, h } = this.size;

    Block.ctx.drawImage(
      Block.image,
      blockKeycode.width * blockKeycode[this.shape],
      blockKeycode[this.type],
      blockKeycode.width,
      blockKeycode.height,
      x,
      y,
      w,
      h
    );
  }

  // getter / setter

  // position
  getPosition() {
    return this.position;
  }
  // size
  getSize() {
    return this.size;
  }
}
위 클래스를 이용해서 좌표, 타입, 형태만 정해주면 쉽게 블록을 생성하도록 구현하고 사용했습니다.
3. 맵 관리자 클래스 생성
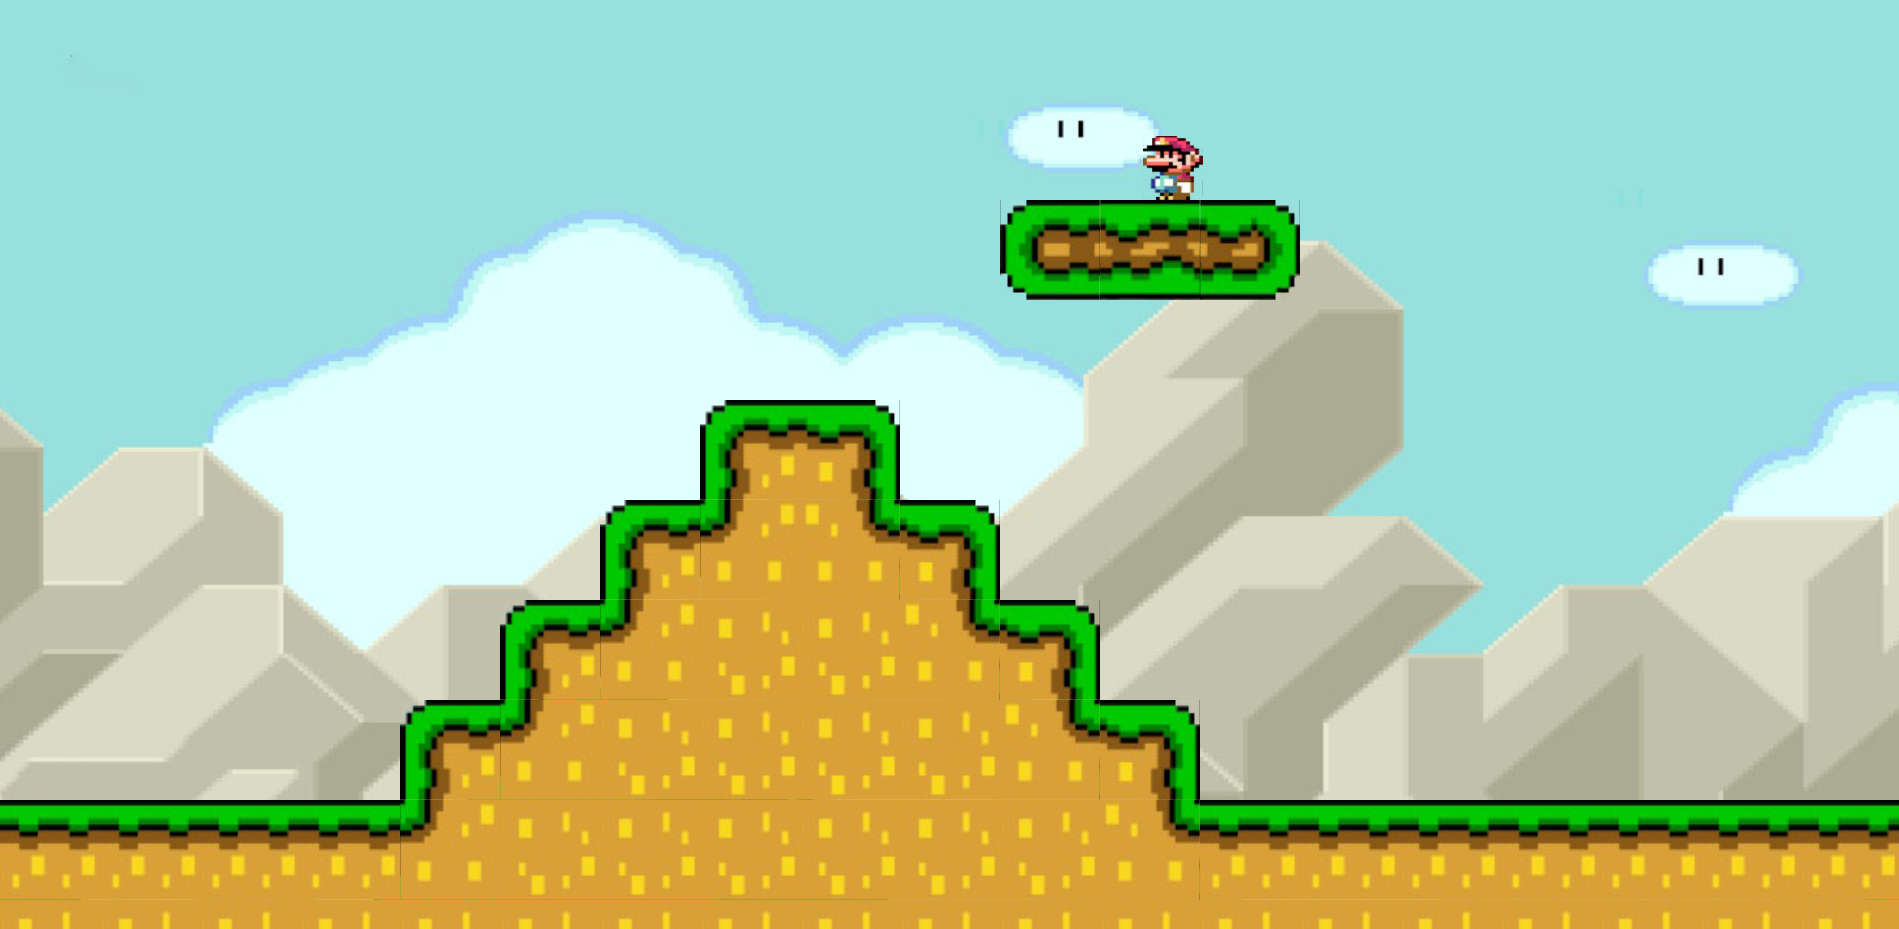
블록을 하나하나 혹은 한 줄씩 나눠서 생성하는 코드를 아무 데나 놔두는 것보다는 하나의 공간에 모아서 맵이라고 정하고, 맵을 한 번에 그리는 게 더 유용하다고 생각해서 맵 관리자 클래스를 만들었습니다.
기본적으로 하나의 관리자만 필요하기 때문에 싱글톤으로 만들었습니다.
- 맵 관리자 클래스
1
2
3
4
5
6
7
8
9
10
11
12
13
14
15
16
17
18
19
20
21
22
23
24
25
26
27
28
29
30
31
32
33
34
35
36
37
38
// class
import Block from "./Block";

// type
import type { MapType } from "../types/index";

/**
 * 맵 생성과 관련된 모든 처리를 관리할 관리자 클래스 ( 싱글톤 )
 */
export default class MapManager {
  static instance: MapManager;

  constructor() {
    // 싱글톤으로 구현
    if (MapManager.instance) return MapManager.instance;

    MapManager.instance = this;
  }

  /**
   * 맵 성성 함수
   * @param type 맵의 종류 선택
   * @param blocks 생성할 블록을 담을 배열
   */
  CreateMap(type: MapType, blocks: Block[]) {
    if (type === "stairs") {
      this.createStairs(blocks);
    }
  }

  /**
   * 계단맵 생성
   * @param 생성할 블록을 저장할 블록 배열
   */
  private createStairs(blocks: Block[]) {
    // ... 생략
  }
}
- 맵 생성 예시
1
2
3
4
5
6
7
8
// 맵 관리자
const mapManager = new MapManager();

// 블록들
const blocks: Block[] = [];

// 계단맵 생성
mapManager.CreateMap("stairs", blocks);
이렇게 하면 맵의 변환도 더 쉽게 처리할 수 있으며, 늘어나는 코드도 한 곳에 정리할 수 있는 이점이 있습니다.
